Showing posts with label caramel. Show all posts

Monday, May 20, 2013

Banana Cheesecake Egg Rolls


Jeremy, Craig, and I went out to eat with my parents last week; my father is suffering from congestive heart failure, and he's not doing well. Yesterday, though, was his 86th birthday!

While at lunch, I was fixated upon egg rolls even though we weren't eating at a Chinese restaurant. I'd looked at the menu online ahead of time - with some hope of being able to narrow down my options, given my infamous lack of decision-making ability when presented with too many delicious things to try - and found two particularly noteworthy items: a Reuben egg roll and the Banana Caramel Fried Cheesecake.

The former, of course, was an egg roll stuffed with corned beef and sauerkraut, served with Thousand Island dressing; and yes, it was as good as it sounds! (Or, at least, that's what Jeremy told me.) Making our own version is high on the "to do" list.

The latter was a crisp, banana-and-cheesecake-filled egg roll, served with a drizzle of caramel sauce. And, well ... since I have a pretty hefty sweet tooth, I needed to make my own. This one jumped to #1 on the "to do" list.

Sweet, creamy, crispy, and with the caramel sauce to complement it, this is a dessert that completely seduces you!

My father didn't order any dessert on the day we met for lunch. He wasn't very hungry - that's what he told our waitress, anyway. He ordered just a cup of chili ... but then he ordered, and ate, a second one, too ... :)


Banana Cheesecake Egg Rolls

8 ounces cream cheese, softened
1 egg
1 teaspoon vanilla extract
1/4 cup sugar
4 small bananas, divided
12 egg roll wrappers
oil for frying
caramel sauce, for serving (use this recipe to make your own, or purchase a jar)

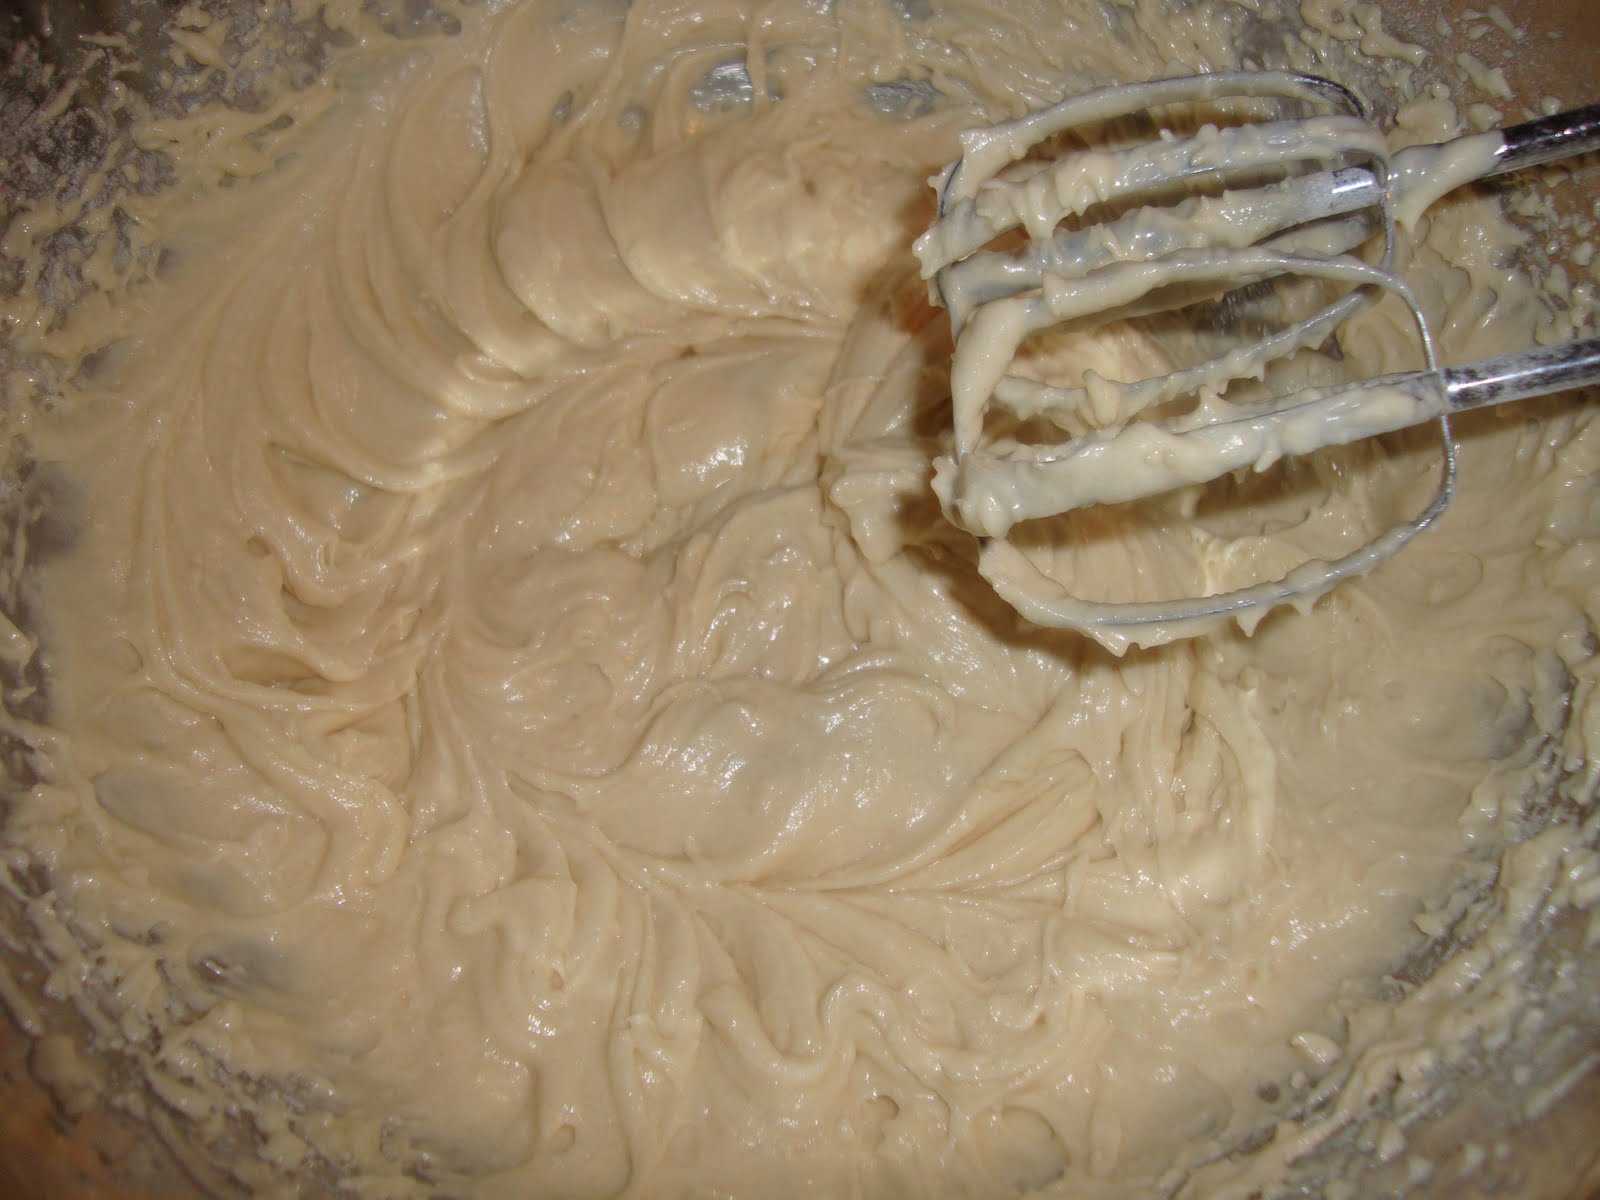
In a large mixing bowl, beat together cream cheese, egg, vanilla, sugar, and 2 bananas with an electric mixer; mixture will not be completely smooth. Stir in remaining 2 bananas, mashed.

In a very large skillet, heat 1" oil over medium-high heat until a drop of water sizzles when splashed into it.

One by one, lay an egg roll wrapper onto the countertop; place 1/4 cup banana filling into the center.


Fold the sides of the wrapper over the filling.


Fold the closest edge up.


Holding the furthest edge up a bit, continue to roll up from the closest edge. (The filling is fairly liquid, though it cooks up nicely when the egg rolls are fried; so you will need to balance the egg roll a bit while rolling it, to keep the filling inside rather than having it ooze out.)


Dampen the visible edge with a bit of water to help seal.


Place the egg rolls into the oil and cook for 3 minutes per side, until golden. Drain on paper towels, then serve with caramel sauce.


Wednesday, October 31, 2012

Tricky Turkish Taffy Treats


I've been on a mission to make non-dairy caramels. I know that the word "buttery" is usually used in conjunction with the word "caramel," so a version that doesn't contain any milk-based products sounds a bit ... well, odd, to be very polite about it.

But those who keep kosher - many of my friends - don't mix meat and dairy products; therefore, they wouldn't eat a caramel apple, for example, after eating a chicken sandwich. One of my co-workers has a very severe dairy allergy, and many people are lactose intolerant.

And so, it seems to me that being able to make a good non-dairy caramel would be a mitzvah ([MITZ-vuh = good deed]), enabling all of these people to enjoy treats that are currently verboten.

I first tried this project last year, using a non-dairy version of half-and-half; my "caramels" - I use the term with a roll of my eyes and a groan - separated into a layer of goo topped with a layer of grease. This was not one of my finer moments in the kitchen.

But my friend Emil Boch - The Kosher King of Ann Arbor, for those who remember my interview with him - told me that coconut products might be helpful, eliminating the chemical factors of pseudo-milks.

In all honesty, by the time I got around to trying this little venture again, I couldn't remember precisely which coconut product - milk? water? cream? - Emil had recommended. My brain has gone beyond being a sieve, and now qualifies for "burst dam" status. Age will cause your brain cells to implode ... I'm living proof.

But I am determined to make this work! So I bought one of the new coconut milk-based So Delicious non-dairy coffee creamers that are all the rage. I had some pareve ([PAHRV] = neither meat nor dairy) margarine. I had brown sugar. I had the last little dribble of my bottle of Drambuie, for flavoring. I was ready.

I put the margarine, corn syrup, brown sugar, Drambuie, and vanilla extract into a saucepan. I brought it to a boil. It looked beautiful.


I added the creamer, and brought the mixture back to a boil. It was much lighter than my dairy caramels had ever been; but I also knew that the mixture would darken as it cooked down.


From having made caramels before, I knew that it takes a loooong time to boil the ingredients down into a candy. You stand, you stir, you stir, you stand, you wait. Fifteen minutes ... liquid. Fifteen more minutes ... liquid. Fifteen more minutes ... thickening, kinda gooey. But still not looking like caramel. Still not the right consistency.

Since my candy thermometer broke and I haven't yet replaced it, I used the cold water test to see if my candy was even remotely approaching the right state. I dropped a little dribble into ice water, and tested to see if it felt like a little rubber ball ("soft ball" stage).

It was well beyond that. The candy was hard.

So I stopped stirring, I turned off the heat, and I poured this beige, marshmallow-y goo into a greased pan.


It wasn't looking particularly appetizing. But I thought perhaps I could call it "nougat," since it was clearly not even remotely resembling caramel. It might be lighter and fluffier than I'd planned, but that wouldn't mean it wasn't good.

But after I wiped up the grease bubbles and let it cool, it was hard. It was a rock. Seriously, this stuff could've scratched a diamond.

So, obviously, I wasn't going to cut it into little squares, wrap it in pretty papers, and give candies to anyone! What to do, what to do ...?

Well, I picked off a little bitty shard that was thin and fragile. I dared to taste it. And ... it was really good! It was sweet, an indescribable hint of the Drambuie and vanilla shining through, a wisp of butterscotchy-ness. I let my boyfriend, Craig, taste it, and he agreed that it was really nice.

He said, "It reminds me of that taffy you used to get, where you'd smash it and break it into little pieces."

That's it! I didn't make non-dairy caramels, I made non-dairy Turkish taffy (which is hard, rather than the chewy salt water taffy).

So, since today is Hallowe'en, I'm offering both tricks - caramels that magically transform themselves into an entirely different entity! - and treats, which are lovely little sweet taffies.

Once the taffy is broken up, larger pieces can be served as a candy; crumbs can be pressed into a shortbread cookie base, mixed into chocolate chip or oatmeal cookie batters, sprinkled over ice cream ... there are countless possibilities!

Always remember: if your recipe doesn't work out the way you'd originally conceived of it, just rename it, re-purpose it, and pretend that's what you'd intended all along ... :)


Turkish Taffy

  • 1/2 cup margarine
  • 1/2 cup corn syrup
  • 2 cups brown sugar
  • 2 tablespoons Drambuie
  • 1 teaspoon vanilla extract
  • 1 pint So Delicious dairy-free French Vanilla coconut milk creamer

Place margarine, corn syrup, brown sugar, Drambuie, and vanilla into a 3-quart (minimum) saucepan. Bring to a boil and boil for 5 minutes. Add creamer and return to a boil; cook, stirring frequently, for 15 minutes. Skim foam from top, then continue to boil for 30 more minutes, stirring frequently.

Prepare a glass of ice water, and dribble a very small amount of the sugar mixture into the water; if it solidifies and is quite hard, the taffy is ready. Remove the saucepan from heat.

Line an 8"x8" pan with foil, extending the foil beyond the edges of the pan, then grease the foil with margarine. Pour the taffy mixture into the pan, and let cool completely.

Pull the taffy out of the pan by using the foil; peel the sides of the foil down. Place the taffy into a sturdy plastic freezer bag, then smash it against the countertop to break up the taffy.

Thursday, October 4, 2012

Samoa Ice Cream Sauce


After having a fabulous time at the Girl Scouts' Cookie Bake-Off Benefit last week and enjoying Samoa-flavored coffee and also buying some Samoa cookies to take home, I have been practically dreaming of the luscious combination of caramel, chocolate, and coconut.

And so, it's hardly surprising that after talking about ice cream sauces with Craig recently - telling him that I make really lovely caramel and hot fudge varieties - I would have an epiphany: combine these two flavors, add some coconut milk, and make a liquid variation on one of my favorite cookies.

The only thing better would be to pour this over Edy's Samoa ice cream, and then crumble a couple of the cookies over the top!

Samoa Ice Cream Sauce
  • 2/3 cup brown sugar
  • 1/3 cup light corn syrup
  • 1/4 cup coconut milk
  • 2 tablespoons butter
  • 1 teaspoon vanilla
  • 1/3 cup half-and-half
  • 1/4 cup semisweet chocolate chips
Bring brown sugar, corn syrup, and coconut milk to a boil over medium-high heat in a 1-quart saucepan; stir constantly and cook for 5 minutes - mixture will foam up. Remove from heat, then stir in butter and vanilla. Stir in half-and-half and chocolate chips until smooth. Return sauce to a boil, and cook for 3 minutes without stirring. Pour into a jar, and let the sauce cool for awhile before serving; if it's too hot, it will burn you and it will simply melt the ice cream instead of turning into a chewy, fudgy sauce when it's poured over the cold substance.

Makes not quite 1-1/2 cups.


Friday, June 15, 2012

Frugal Floozie Friday - Roger Monk's Yappy Hour


Roger Monk's is today's Frugal Floozie Friday feature for many reasons.  It's got great food, and it offers a wide variety of appetizers, drinks and desserts for $5 or less - our mandatory per-person budget - during its weekday Happy Hour.

But not only does this casual, comfortable, but still sophisticated restaurant welcome humans, on Thursdays it also welcomes dogs at its fabulous Yappy Hour.  Yes, well-behaved humans and their adorable leashed owners can gather on the back deck for food and fun - a chance to chat with fellow animal lovers and furry friends.

So, of course, I had to bring my grandpuppy, Poochie, one gorgeous sunny afternoon.  He's a very sociable beast - a veritable party animal!

Jeremy, Stuart (Jeremy's dad, my ex-husband), Poochie, and I recently took advantage of a perfect summery day to enjoy some fabulous food.  We started with appetizers, each of which costs $5: a very generous portion of chips with a slightly spicy salsa, crisp-coated and tender chicken satay with a creamy peanut sauce, and enormous mussels braised in a lemon-wine sauce.  These were delicious, as well as being perfect for sharing.   The two other options we could have chosen were hummus served with toasted pita bread and a duck liver mousse served with crackers.

We drank water - as did Poochie, who was given his own personal bowl of water even before the humans were taken care of; and it was served refreshingly with orange rather than the ubiquitous lemon.  But if you're in the mood for something a bit stronger, 20-ounce pints of draught beer cost $4; glasses of wine and drinks such as Martinis, a Daiquiri, or a Cosmopolitan cost $5.

And then there was the temptation of dessert.  Desserts, too, cost an even $5 - perfect for our budget.  As good as the appetizers were - and they were very good - these were absolutely the stars of the show.


Jeremy order the utterly decadent chocolate mousse pictured at the top of the post.  It was as thick as ice cream, rather than pudding-like as some can be.  It was intensely chocolatey and simply addictive.  You'd be tempted to keep eating if the portion were larger, but the full coffee cup of this treat was a perfect and generous serving.

As soon as I heard a few of my very favorite words - "bread pudding," "cherries," and "caramel" - all in the same sentence, as our server recited the dessert options, I knew that this would be mine.  Bread pudding featuring tart cherries and a bourbon caramel sauce ... oh, be still my heart!  This was rich, sweet, had a bit of a kick, and was just perfection.  I loved the dessert, but would happily have just taken a spoon to a jar of the sauce and eaten it "as is" even without the tender, fabulous pudding base.

Stuart was in the mood for a hot fudge sundae, which isn't on the menu; but our very kind and helpful server, Dennis, offered to bring a serving of vanilla ice cream (which is a standard offering) topped with the bourbon caramel sauce.  Although one of my personal pet peeves is customers who make special orders - hard-working restaurant staff are not personal chefs - I was very pleased to know that great service and keeping customers happy was high on the agenda at Roger Monk's.

There are many public places that dogs aren't welcome, so it's wonderful that on Thursdays you can linger over great food and cool drinks at Roger Monk's while your dog gets to play with new friends.  Poochie was fussed over by the staff and by other customers enjoying the fabulous weather, and he just loves being the center of attention!

We had a grand time at Roger Monk's, and highly recommend its Happy and Yappy Hours for fabulous treats at reasonable prices.  What a great opportunity to unwind at the end of the day!


Roger Monk's
5400 Plymouth Road
Ann Arbor, MI 48105
734-662-1647
Tuesday - Saturday: 3 - 10 p.m.
Sunday: 3 - 9 p.m.
Closed Monday
Happy Hour: Tuesday - Friday 3 - 6 p.m.
Yappy Hour: Thursday 4 - 7 p.m.


View Larger Map


Roger Monk's on Urbanspoon

Tuesday, November 29, 2011

Sauteed Apples à la Mode + Giveaway Winner


So, who won the Hodgson Mill certificate that I offered as a giveaway last week???

Well, on Sunday morning at 8:05, I counted entries. I plugged numbers into Random.org's Sequence Generator, and out rolled #7. (Chris, of Nibble Me This, offered a great suggestion for capturing the results. But I don't use Firefox and I'm a Neoluddite technodolt, so we're still doing the cheap copy/paste method ... sorry!)

Random Sequence Generator
Here is your sequence:

7


And who is Seven, other than a character on "Star Trek: Voyager"???

The Domestic Diva - Mazal Tov!!!

I wish I had enough certificates to give to everyone, 'cause it would have been fun to play Santa! But alas ....

So now, on to the food!

I was in the mood for something apple pie-ish the other night, but didn't want the crust from a pie. I also didn't want to wait for something to bake; I needed immediate gratification.

So I essentially cooked up something reminiscent of a pie filling, and I plopped an incredibly generous scoop of butter pecan ice cream on top of it ... because I'm worth it!

In about 10 minutes - less time than it would have taken me to drive to the grocery store to get my fix - I was able to create a warm, fragrant, homemade dessert featuring beautiful fall apples in a rich caramel sauce.

Is there anything better on a chilly evening?

Sauteed Apples à la Mode

2 tablespoons butter
1 tablespoon vanilla extract
2 Honeycrisp apples, cored, peeled, cut into 1/2" dice
1/2 cup caramel ice cream sauce
2 scoops butter pecan ice cream

In a medium skillet, melt the butter and the vanilla together over medium heat. Add the apples and stir to coat them with the butter. Cover and cook for 5 minutes, until the apples are just tender. Uncover the skillet and stir in the caramel sauce; cook for 1 minute.

Divide the apples among 2 serving dishes and top with the ice cream. Serve immediately.

Serves 2.

Friday, November 18, 2011

Frugal Floozie Friday -- Kilwin's


Today's Frugal Floozie Friday post features the consummate, classic Fall treat - caramel apples from Kilwin's.

These aren't just any ol' caramel apples, made with little cellophane-wrapped squares ... nope. These are hand-dipped into caramel that has been tended in copper kettles, from the original recipe developed by Don Kilwin himself.

To their credit, Kilwin's uses Granny Smith apples, whose tartness perfectly complements the sweetness of the caramel, which tantalizes with just a hint of butterscotch. The texture is perfection - firm enough to adhere to the apple, soft enough to bite or cut directly into the sublime treat without resistance.

The apples that are dipped into nuts are just over our mandatory Frugal Floozie Friday budget; but the plain ones - a term which is woefully dismissive of a truly luxurious indulgence! - are a perfect $5.

I walk by the windows at Kilwin's on a regular basis, gazing at the beautiful rows of caramel apples each time; they are lined up in formation, ready to go to a good home. It is easy to be seduced by them when you see them in their beautiful simplicity. And once you've eaten one, you'll want to return again and again and again ....


Kilwin's
107 East Liberty Street
Ann Arbor, MI 48104
734-769-7759


View Larger Map

Tuesday, September 27, 2011

The Saga of the Broken Apple Tart


'Tis the season to pick apples, fa la la la la la la la la. Whether you pick them at an orchard or at a farmers' market or at a grocery store is up to you. But you must pick them!

And while there are lots of cobblers and crisps and applesauce in all of our futures after we pick our apples, I thought I might make something a bit more elegant and also use the tart pan I just found again after moving last month.

I made a Caramel Apple Tart ... sigh.

Of course, I have to admit that my cooking venture with the apples didn't start out as a tart; my original plan was to make dairy-free caramel apples for my co-workers, one of whom has a dairy allergy. But the caramel was too hard, and became too brittle to bite into.

So I smashed the caramel off the apples and melted it with a bit more of the non-dairy milk substitute I'd used in making the original batch. I poured the now-liquid mixture into a greased pan, refrigerated it, and hoped to cut it into soft caramels.

But ... the ingredients separated and the greasy butter substitute rose to the top, coating everything in a layer of slime. It was pretty disgusting! (Remember, just 'cause I write about food doesn't mean that everything I make is a success! We all have our trials, our errors, our experiments, our humiliations ....)

So, then, after venting in frustration as my plans had gone so significantly awry, I still had apples to use up.

Et, voila! An apple tart!

I contributed some caramel sauce and some leftover streusel topping from a different baking project to the cause, and thus was able to clear some items out of my refrigerator while also redeeming my afternoon of kitchen adventures.

And the tart turned out beautifully - gorgeous, with tender apples coated in sweet caramel.

My ego was restored!

That is, until I tried to slice the tart for its photo op. I just didn't have any "mazal" - luck - with my apple ventures on this particular day. Each time I tried to cut a piece, the back crust crumbled or the bottom crust only came up partially from the pan ... oy! Sometimes it's easier to just go to the grocery store!

But once again, I pulled a proverbial trick out of ye olde hat. I simply scooped up the crust, filling and topping and plopped some onto a serving plate. A never-unwelcome scoop of vanilla bean ice cream, and ... voila!

I present to you an elegant French dessert which will now be known as Tarte Cassée de Pomme [tart cah-SAY deh POHM]: Broken Apple Tart.

Broken Apple Tart

Tart:
1 pie crust, at room temperature
8 apples, peeled, cored, cut into 1/4" slices
2/3 cup caramel ice cream sauce

Streusel:
1/4 cup butter, melted
1 cup cookie crumbs (from Nilla wafers or graham crackers)
1/2 ounce sliced almonds
1/8 cup brown sugar
1/4 teaspoon cinnamon

Preheat oven to 375F.

Place the pie crust into a false-bottomed tart pan (or a pie dish). Press crust into the bottom of the pan and up the sides; use a knife to trim excess dough.

In a large mixing bowl, combine apple slices and caramel sauce; pour into the crust.

In a small bowl, combine all of the streusel ingredients; sprinkle over the apples.

Place the tart pan onto a larger baking sheet because the caramel sauce seeps a bit, and bake for 50 minutes until top is golden and the apples are tender when pierced with a knife.

Let cool to room temperature, then try to serve it in slices. When it won't cooperate, simply scoop it up, place it on a serving dish, and offer it with ice cream or whipped cream ... and no explanations of what its original incarnation was supposed to be!

Makes 8-10 servings.

Tuesday, April 19, 2011

Chocolate Caramel Matzah


I've eaten far more than my fair share of chocolate-covered matzah over the years -- that stuff is ridiculously good! I've often wanted to make my own, with a caramel layer as well, but have never managed to get around to it ... until now.

Recipes for this abound; so I sort of glanced over a few, determined my own protocol, and then went to work. Though really, it's hardly labor-intensive -- a few minutes at the stove, a few minutes waiting for the treat to bake, another minute waiting for the chocolate to melt. The real work was waiting until last night for the start of Passover to eat this luscious treat, after making it on Sunday afternoon!

I've seen recipes for this using saltines or graham crackers as the base; but I have to say that the crispness of the matzah really serves it well. If you don't already have a stockpile of matzah for the holiday, wait until next week when Passover has ended and you can get a box on sale.

Chocolate Caramel Matzah

2 plain matzot ([mahtz-OTE] = the plural of matzah)
1/2 cup brown sugar
1/2 cup butter
1/2 cup semi-sweet chocolate chips

Preheat oven to 350F. Line a 9"x13" baking pan with foil, then grease the foil. Lay the matzot in the pan, side-by-side.


In a medium saucepan (because it bubbles up), melt the brown sugar and the butter together over medium heat until the mixture bubbles. Once it's bubbling, turn the heat to medium-high and stir constantly until the caramel thickens, lightens a bit in color, and pulls away from the sides of the pan -- approximately 2 minutes.


Pour the caramel over the matzot, and carefully spread it with a spoon.


Bake the matzot for 5 minutes or so, until the caramel has darkened a bit. Remove from the oven and sprinkle the chocolate chips over the matzot.


Wait 1-2 minutes for the chocolate to melt, then spread it evenly over the matzot.


Let everything cool completely, then cut each matzah into 12 pieces.

This can serve 1 or it can serve 2 dozen, depending upon how generous you're feeling ....

Busy Mom's Tips Tuesday Blog Hop
Photobucket
”Family

Tuesday, November 9, 2010

Caramel Apple Crisp Pie ... Oh, My!!


Two weekends ago, WEMU/89.1 FM in Ypsilanti -- where my friend Jessica Webster, head of the Food & Drink page for AnnArbor.com, is a DJ on Sunday afternoons playing "jazz and stuff" (as she once phrased it) -- was holding a pledge drive. (They still need to raise $300,000 to meet their Fall fundraising goal, so any contributions would be most gratefully appreciated; click here to donate.)

Somehow, before Tom and I tuned in, Jessica and others in the studio with her at the time had started a discussion of listeners' favorite pies. Well, that was easy -- Caramel Apple Crisp Pie! I had already been planning to make one, so the idea had been swirling around in my brain. First of all, it's just the proper thing to do in the Fall; but also, Tom is not an apple pie fan (gasp!), so I had to bake this in order to redeem the treasure that I believe the dessert to be.

Tom and I made a pledge to help the radio station, and I claimed Caramel Apple Crisp Pie -- combining a trifecta of desserts: apple pie, apple crisp and caramel apples -- to be my very favorite. It's apple crisp baked in a pie crust, topped off perfectly with a drizzle of caramel sauce ... an idea to which I give full credit to Jeremy, who suggested it several years ago in a moment of sheer brilliance.

And so, then it was necessary to bake this glorious specimen ... and bake I did. If I'd been at home rather than at Tom's, I'd have added a bit of cornstarch and a touch of cider to the apple mixture, then cooked it on the stovetop to give it a bit of a gel to bind the filling together better.

But since I didn't have either of those ingredients with me, I made it according to the instructions given below and that means the apple chunks have a bit of a tendency to fall out of the crust. Oh, well ... it hardly impacts the flavor, only the aesthetics. It's still luscious and sweet and slightly spicy and just wonderful!

So if you're tired of plain ol' apple pie, I invite you to bake this one. It's quick, it's easy, and it's absolutely divine ... :)

Caramel Apple Crisp Pie

1 crust for a 9" pie pan

Filling:
1 3-pound bag apples
1/4 cup sugar
1/2 teaspoon nutmeg
1 teaspoon cinnamon
2 tablespoons butter

Topping:
1/2 cup butter, melted
1/3 cup flour
1/4 cup brown sugar
1 packet instant oatmeal (I used Maple Nut)
1/4 cup chopped walnuts
6 ounces caramel ice cream topping

Preheat oven to 425F. Place crust into a 9" pie pan.

Filling: Peel, core, and chop the apples into 3/4" pieces. Place into a large bowl and mix together with the sugar, nutmeg and cinnamon. Place the apples into the pie crust and dot with the butter.


Topping: Combine the butter, flour, brown sugar, oatmeal and walnuts in the same mixing bowl that you used for the filling ('cause there's no reason to wash extra dishes, right???). Spread over the apples. Drizzle the caramel sauce over the top of the pie.


Bake for 15 minutes, then reduce heat to 350F and bake for 30-40 minutes more until apples are tender when poked with a knife. (There's a lot of variation for this last step, depending upon the type of apple used, the juiciness, etc.) Check on the pie mid-way through the baking; if the topping is getting too dark, cover it with a piece of foil.


Serve warm with whipped cream or ice cream, if desired.

(Entering this recipe into the Kitchen Corners November Cook-Off: "I Love Apples.")


hearthandsoulgirlichef

Busy Mom's Tips Tuesday Blog Hop

Tempt my Tummy Tuesdays


Monday, October 4, 2010

Let Them Eat Birthday Cake

Tom's birthday was on Friday, and we both had the day off to celebrate. Somehow, he managed to arrange for a gorgeous sunny day in the mid-60s, despite it being Fall in Michigan when the expected weather is cold and dreary. Oh, would that we could have such an arrangement for my birthday in December ... ha! Sometimes I even get snow for mine; and Jeremy's 18th birthday, two Januarys ago, brought a blizzard. But Tom's birthday was absolutely perfect, weather-wise.

He has admittedly been alone (i.e.: sans girlfriend) for many of his adult birthdays. So when I offered to bake him a cake he was rather pleased by the notion of someone fussing over him like that. I always bake cakes for my loved ones; Jeremy usually chooses cheesecake. So I would actually have been offended if Tom had said he'd rather have something from a bakery, or avoid the sugar coma altogether.

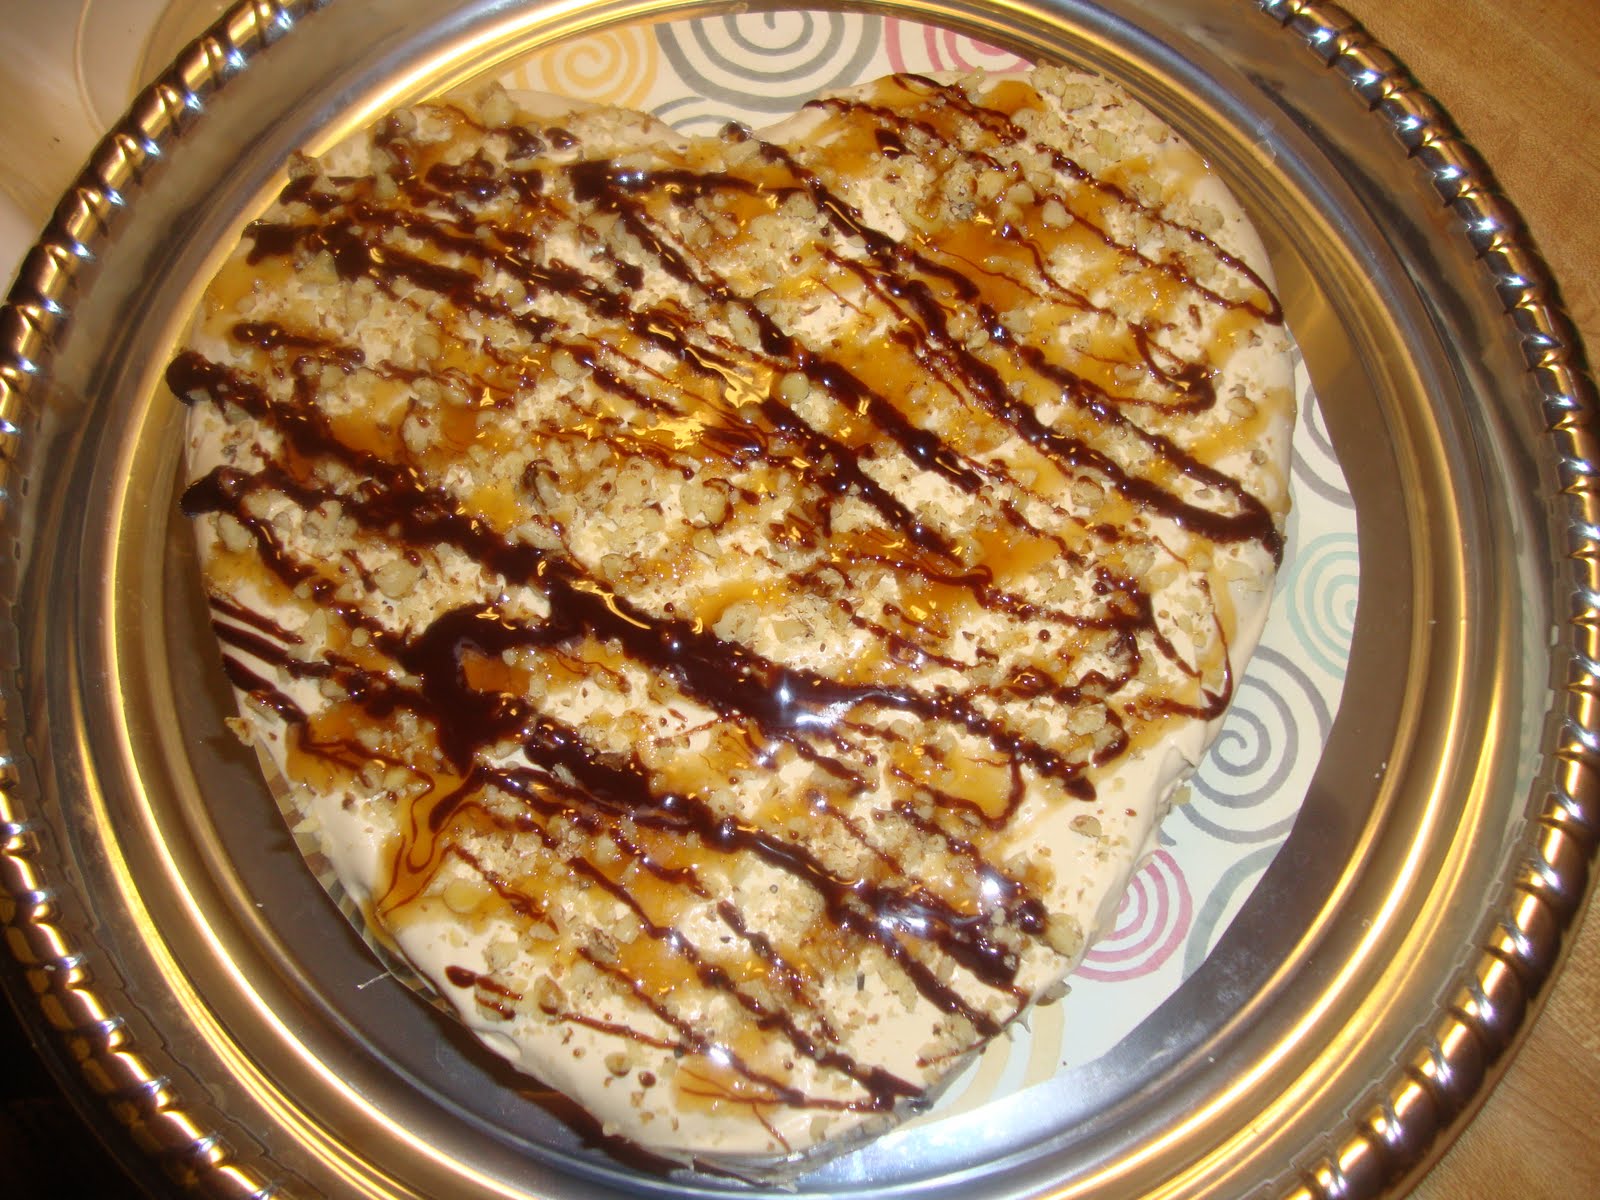
But he contemplated his options and decided that he wanted a chocolate cake, 2 layers. Perhaps some coffee-flavored whipped cream, rather than traditional frosting. Drizzles of caramel and chocolate, and -- of course! -- walnuts, which complete any baked good in his opinion. As long as there was no rolling fondant or forming gum paste flowers -- neither of which I've ever worked with -- I could make this happen.

Of course, senile twit that I can sometimes be, I had the walnuts out on the counter as I prepared the cake and then completely forgot to add them to the batter ... sigh. So they ended up sprinkled over the frosting instead. But other than that, I think the cake turned out the way Tom had hoped it would; he seemed utterly tickled that he could actually place an order for a specific cake and have it appear for him. May all of his other birthday wishes come true ... :)

Chocolate Layer Cake with Coffee-Flavored Whipped Cream Frosting

(cake recipe slightly adapted from the Sour Cream Chocolate Cake recipe in The Pleasures of Afternoon Tea by Angela Hynes)

Chocolate Cake:
2 tablespoons butter, softened
1-1/4 cups sugar
1 large egg
1 teaspoon vanilla extract
1 teaspoon baking soda
1 cup plain yogurt
2 cups flour
2 teaspoons baking powder
1 teaspoon kosher salt
1/2 cup unsweetened cocoa powder
1/2 cup hot coffee

Preheat oven to 350F. Grease two 8" round cake pans.

In a large bowl, using an electric mixer, cream together butter and sugar. Beat in egg and vanilla. Combine baking soda and yogurt; mix into batter. Add flour, baking powder and salt; mix into batter.

Combine cocoa powder and coffee, stirring until smooth. Add to batter and careful mix in.

Divide batter between the prepared cake pans, making a slight depression in the center so that when they rise the cakes will be flat.

Bake for 20-25 minutes until a toothpick inserted into the center comes out clean.

Carefully remove the cakes from the pans, and leave them on a rack to cool completely.

Whipped Cream:
8 ounces cream cheese, softened
1 tablespoon instant coffee granules
1-1/2 cups whipping cream
1/2 cup confectioners' sugar

Place the cream cheese into a large mixing bowl and whip it using an electric mixer.

Add the coffee and half of the whipping cream; beat on "high" until peaks are starting to form.

Add the confectioners' sugar and beat, then add the rest of the whipping cream and beat until the mixture is the consistency of soft frosting.

Place one of the cake layers onto a serving tray; tuck pieces of foil underneath the cake so that the frosting doesn't mess up the tray as you're spreading it. Spread a 1/2" layer of frosting over the top of the cake layer, then place the second layer on top. Spread a generous 1/2" layer of frosting along the sides of the cake, and then cover the top. Save any excess frosting -- it's great stirred into coffee or cocoa, or just eaten with a spoon!


Garnish:

1/4 cup finely chopped walnuts
caramel ice cream sauce
Hershey's chocolate sauce

Sprinkle the walnuts over the top of the cake. Dip a fork into the jar of caramel sauce, then drizzle some of the sauce diagonally over the walnuts.

Use the same fork technique to drizzle some of the chocolate sauce in the opposite direction over the cake. Gently pull the foil pieces out from under the cake.


Cut and serve the cake ... and enjoy! Refrigerate leftovers, so the whipped cream doesn't spoil.


Photobucket


The Girl Creative


Photobucket


Looking for Something ...?